
Readers will recall that a few days ago we offered our opnion on GIMP. I am still using GIMP, and I believe its applications for my clients work will be invaluable!
However, I reported on a video from RootsWeb that showed the viewer how to use GIMP, and at first glance, their manor for adding text at the bottom of the photo seemed to work flawlessly. But after using GIMP for several days, I'd like to report that the RootsWeb video is a bit confusing, and has the viewer take steps that aren't necessary in saving photograph.
So....
I will walk you step by step through using GIMP.
From the FILE button in the left hand corner of the program, click on OPEN. From here you will be able to peruse your own files and obtain the photo you would like to add text to.
After your photograph has opened onto the screen, you will need to resize the file in order to add text at the bottom. So, you will now click on IMAGE. When that window opens, click on CANVAS SIZE.
A new window will open: SET IMAGE CANVAS SIZE. In order to change the canvas size to add text, you must first unlock the ratio. In order to do this, click on the image of the chain links. [A broken chain will appear, which allow the ratio to be disproportinate.] I leave the image on pixels [the default setting] as it easiest for me, however, you can change the setting to inches if you prefer. Now we want to change the HEIGHTH of the canvas. So click on the Increase button for the Height of the canvas until you see enough space beneath the photo appear to add the appropriate amount of text you wish to add. Once you have that, click on RESIZE at the bottom of that window. The window will now close and your resized canvas appears with a gray area at the bottom.
You will now want to add text. In the Toolbox window, click on the big bold letter "A" [for text]. [The Toolbox works similar to Word or Publisher and is easy if you are even fairly familiar with those programs.] At the bottom of the Toolbox you will now see a variety of settings you can change for your text. For the Font, I generally am satisfied with the Sans Bold for my client work. You might want to choose another setting, there are several to choose from. The size will depend upon the photo you are working with, and can be increased or decreased simply by clicking on the up or down buttons.
Once you have set your font and size, you now need to bring your cursor to the canvas and click in the upper left corner of the gray space. The GIMP Text Editor will appear. In this area you will type the text you want to appear at the bottom of your photograph. Once you are finished writing the text, you need to click on CLOSE. The GIMP Text Editor window will close. You may now need to adjust the size of your Font within the Toolbox to get the print to fit your text area.
Once you have your print the way you want it, you must now Crop your photo. From the Toolbox choose the rectangular button just as you would from most photo programs. Bring your cursor to the photo and bring your cropping area within the boundaries you choose [you can see this really well on the RootsWeb video]. Once your field of cropping has been determined, right click on your mouse, then click on Image. Now click on Crop To Selection. Simply hit your + or - key on your keyboard, and your crop is complete.
Now you need to merge the two fields you have created [photo and text]. Simply right click on your mouse once more. Click on Image, then click on Merge Visible Layers. Another window will open, Merge Layers. Make sure the setting is on Expand as Necessary [the default setting], then click on MERGE. [You will not see a visible change.]
Now you must flatten the image for saving. Once more, right click on your mouse. Click on Image, and then click on Flatten Image. The text at the bottom will lose it's gray background and the background will turn white.
All that's left now is to save your image! Simply click on FILE in the upper left hand corner of your screen. Then click on Save As. Choose the location and title for your file, and click on Save. Another window will open up, giving you the opportunity to change the size of the file. [Default setting, and the only setting for saving is a JPEG file, however, you can change the size of the file for saving space. Be forewarned, I haven't tried yet to change the size of the file, as I'm not sure if that will cause degradation of the photo yet or not.] Click on SAVE.
Once your photo is saved, you will then click on FILE in the upper left corner again, and then click on CLOSE. The photo will then leave the larger window and is now safely stored in your files.
Since this program saves files only in JPEG format, I would suggest that you use an external source for saving your files. Either save to data CD, a USB stick, or to an external hard drive. This will help save space on your computers hard drive. [I personally keep all clients work on an external hard drive.]
I hope this helps you to better understand how to utilize the GIMP program.
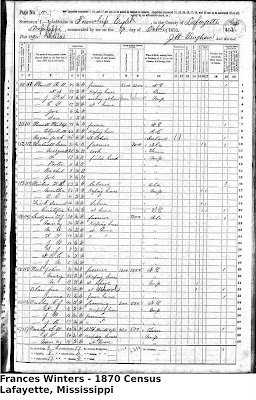
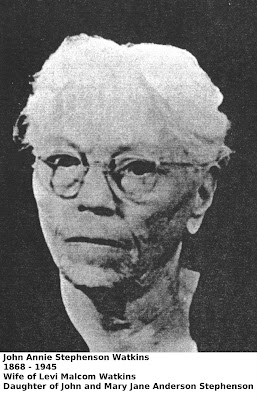
An example of using this program with a photo, and another using it with a document, is above.
No comments:
Post a Comment